How to rebuild an SY/7
EPISODE 3 - Painting The Hull And Replace The Deck Fittings.
Now the hull has been prepared and any repairs made, it is time to start putting the colour back on.
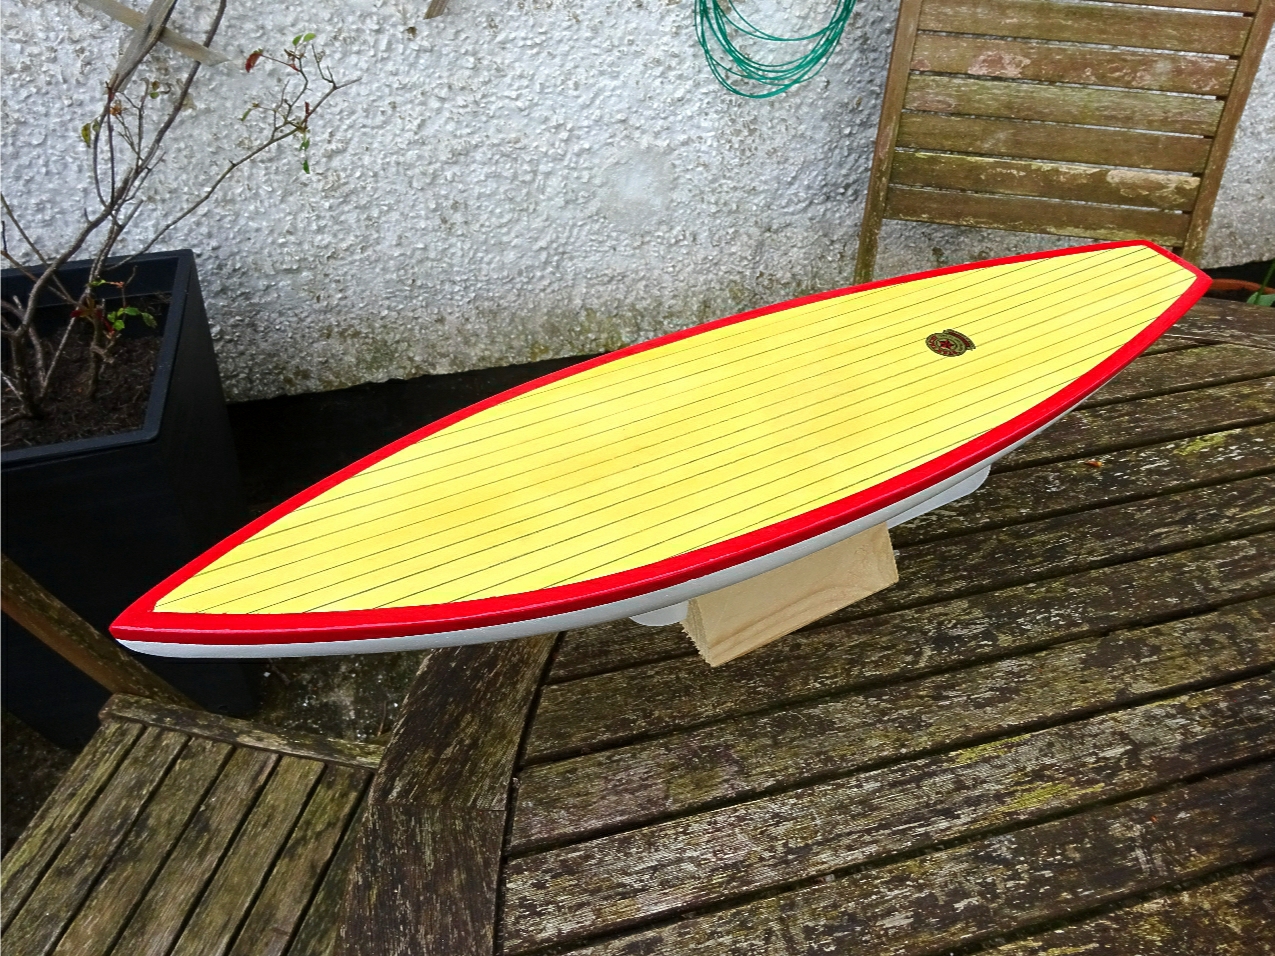
The whole hull received a further two thin coats of white undercoat and also coated the keel. I am going to paint the keel red as it was originally, so covering the keel and with the hull upturned, I applied several coats of white enamel to the hull, not the deck as I will explain later, (Humbrol White No.22). I am leaving painting the keel until last thing as I want to be able to hold the hull in an upright position to complete the deck and the deck edge painting, if you are having a white keel, you could paint it at this point. The SY/7 has a white, plank lined deck which is given a golden colour. This is how to do it.
Mask around the deck edge and cover the painted hull, a further two coats of white undercoat are applied to the deck to give it body. When thoroughly dry and hardened, rub back the surface gently with very fine rubbing paper to give a smooth finish. Do not use gloss paint on the deck area as it will not allow pencil marks to grip.
For the planking use a sharp pencil, first scroll a line around the whole perimeter of the deck about 1/4" in, then from the point of the bow to midway across the rear of the stern, scribe a line using a straight edge, this is your centreline.
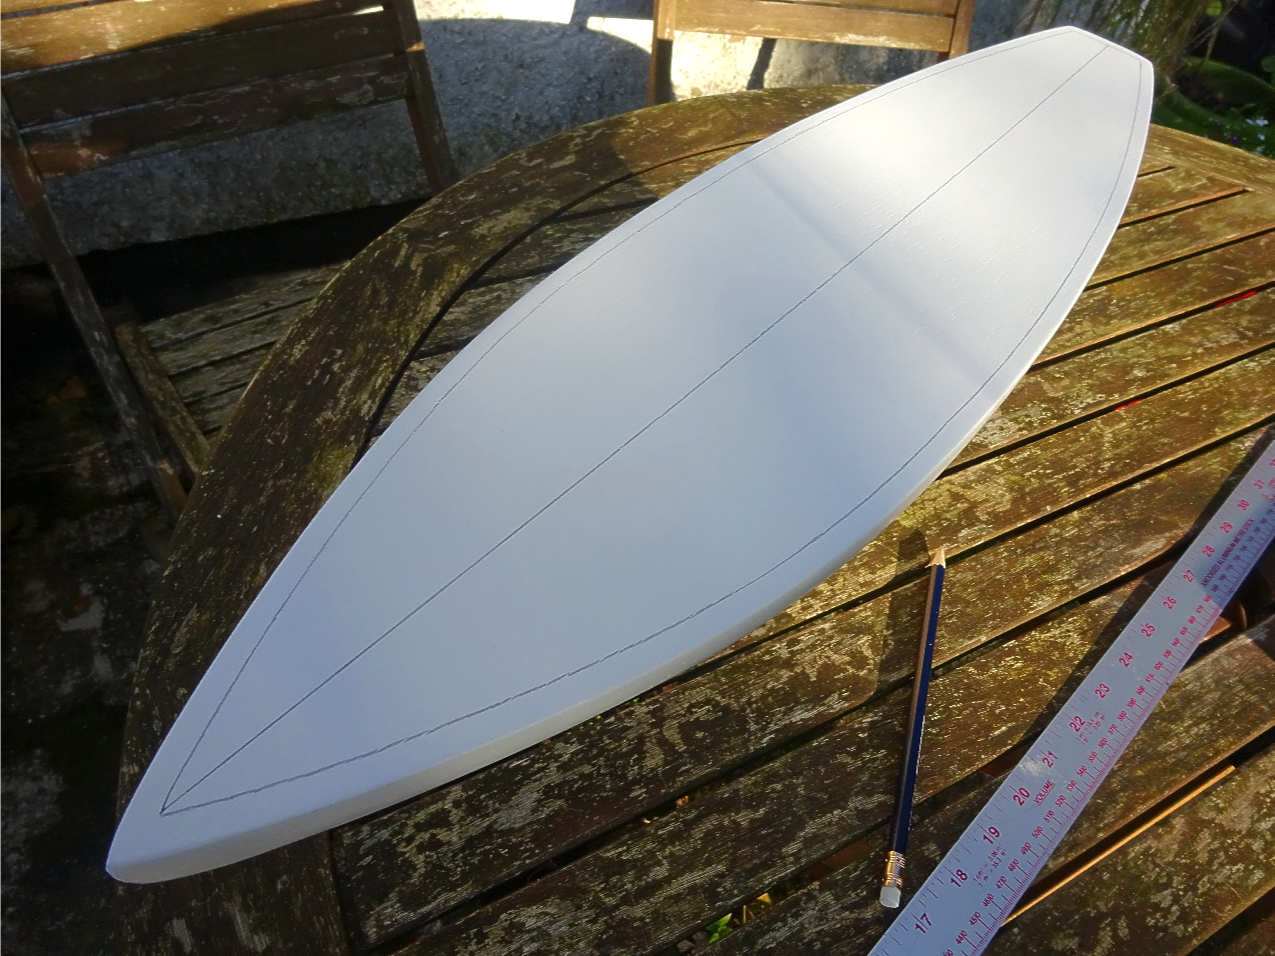
Now with the straight edge draw parallel lines outwards from this centreline towards the outer edge of the deck with the lines about 5/16 - 3/8" apart, one side then the other.
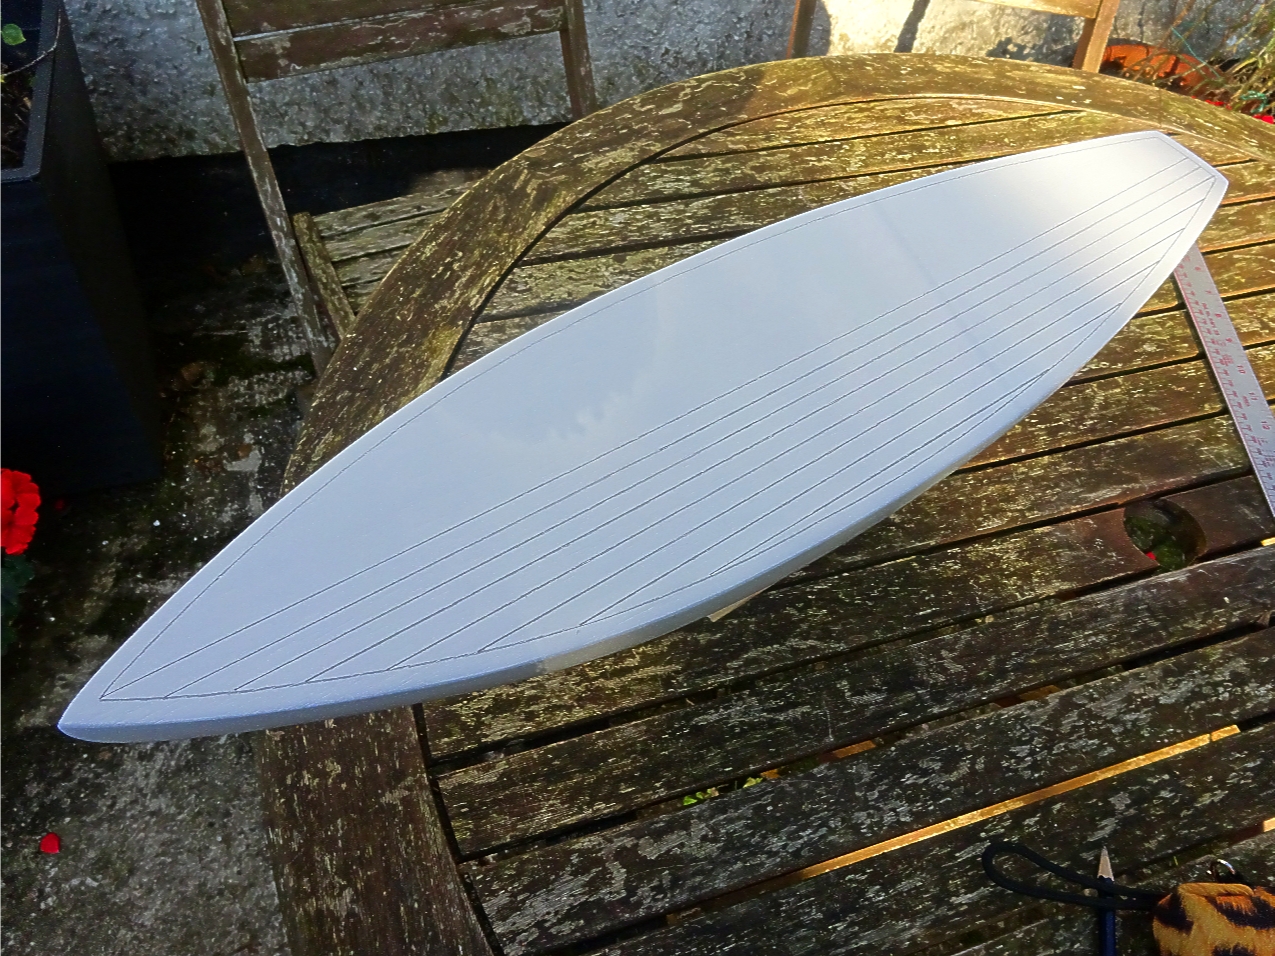
At this point I estimated where the deck logo transfer will go and erase about 1" of the centre line, make sure you allow for the sheet horse not to obscure your deck logo.

When you are happy with the lining, coat the entire deck for front to rear with a coat of thinned out yacht varnish* and leave until the next day to dry. Apply a second coat and leave to dry. At this point apply your deck logo transfer and again leave to dry. Finally apply a third coat of varnish. Your deck should now have the required "Golden" colour, leave to dry and harden. Use yacht varnish as this has a natural yellow shade to it and builds up with successive coats.
* Thinning the varnish (Try 75 / 25%, varnish / thinners or increase to 50 / 50% depending on the temperature).

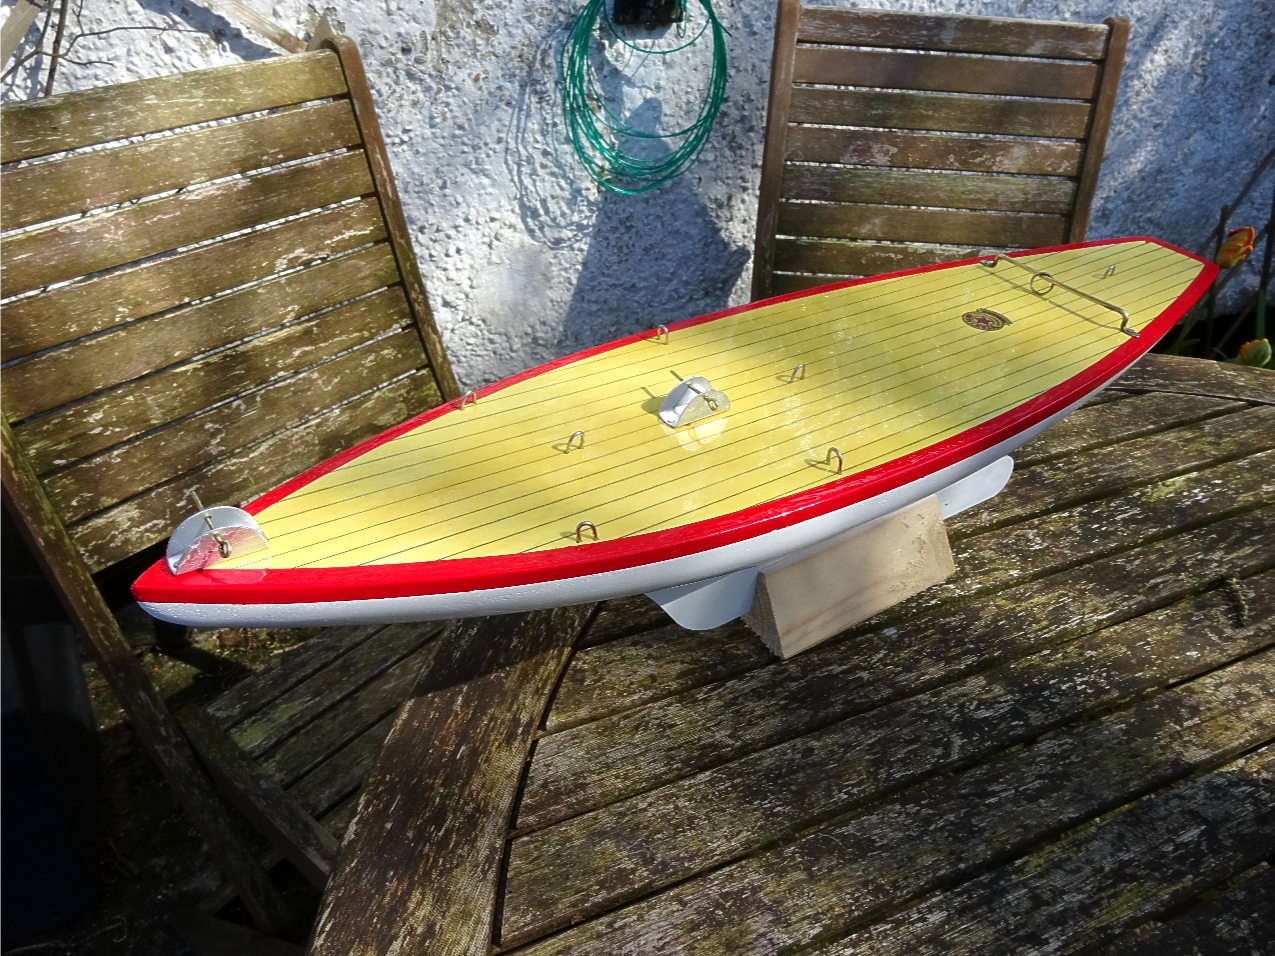
Next is the deck edging colour, the SY/7 used a red gloss paint (Here I am using Humbrol Bright Red No. 19). In the factory this process was done by eye, freehand with a paint brush but as I and probably everyone else reading this do not have this capability, I am going to use 6mm fine line vinyl edging tape (Get this online or from Halfords). You can use masking tape but I find it does not always seal against the paint. Starting at the bow, come inwards on the deck from the pencilled edging line about 1/32", this will hide the edging pencil line, run the tape front to rear, around the stern and back up to the bow trimming both ends for a neat join. Take your time and apply pressure to the tape to form any tight curves, you may find it easier at the stern to trim the tape and use smaller lengths. Now do the same on the hull sides using the same spacing from the deck edge as the deck. When finished, rub up the surface to be painted for a key for the paint, I use a scotch pad for this.
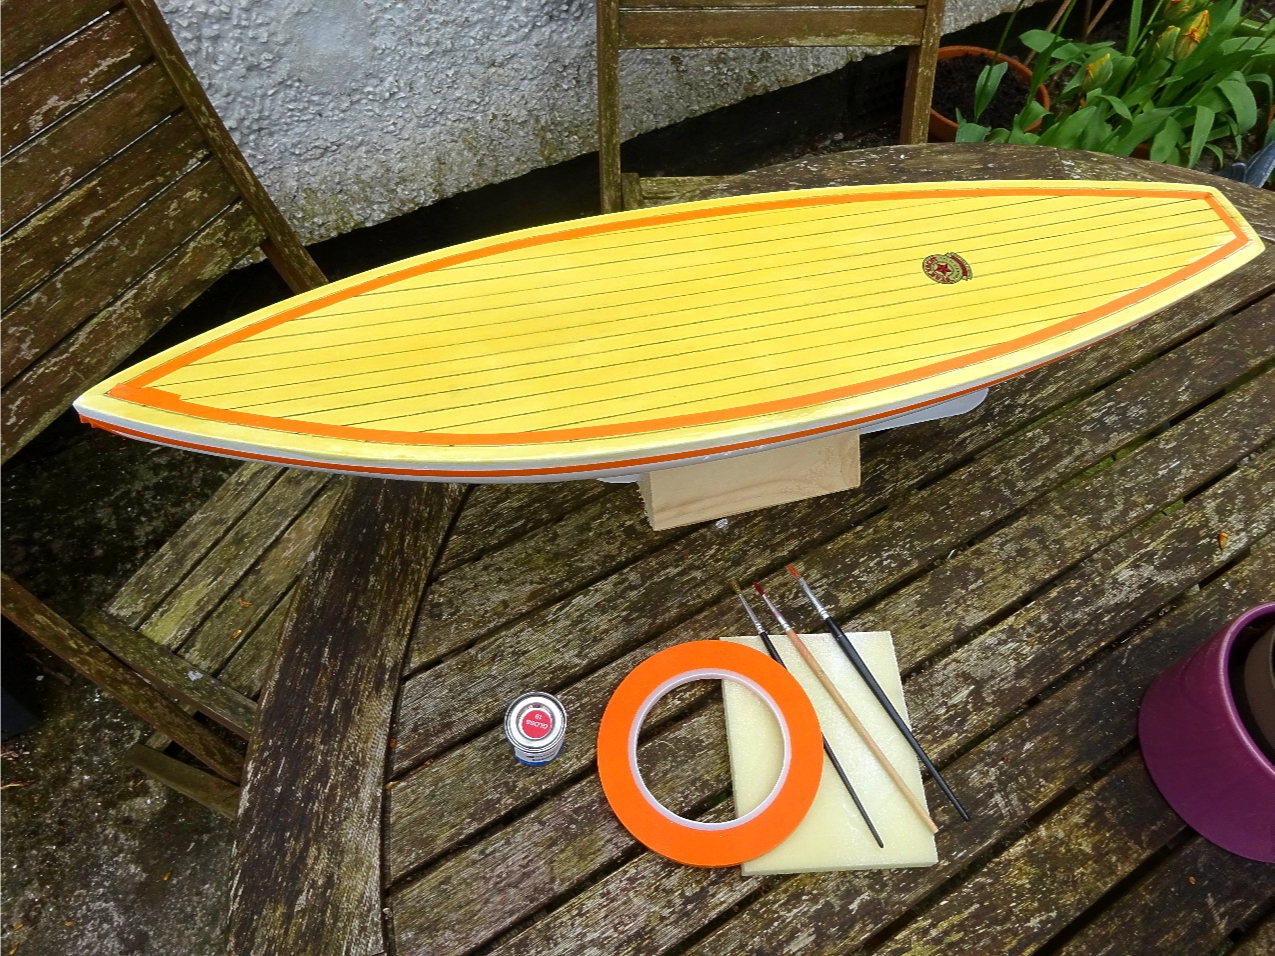
Stir your paint up for a long while and using it neat, starting at the bow, apply a coat along the deck for a couple of inches and then drop down to the hull side for the same, continue right around until finished. Give it half an hour and put a second coat on, leave to dry and you should have a nice glossy edge strip, remove carefully the edging strip.
Referring back to your deck plan diagram, work out where all of the staples and the mast mounts are going to go.
The procedure for making a set of new staples; CLICK HERE
If you have the original holes then it is easy just to tap them back in again or if you have filled them in like I did, then move them about 1/8" away from the original holes with reference to your diagram, make a prick in the surface with a spike so that the staples don't move when you tap them home with the hammer. I start with the bow sprit anchor staple and work backwards using the centre plank line and the deck edging as a guide, one side then the other to finish with the rear staples. Now the centre mast mount using to short flat head pins and followed by the front bowsprit mount being careful to site it enough rearwards to stop the pin emerging through the paint under the bow. Finally, place a brass ring on the sheet horse and refit the sheet horse to the rear deck area using two 1/2" flat head pins.
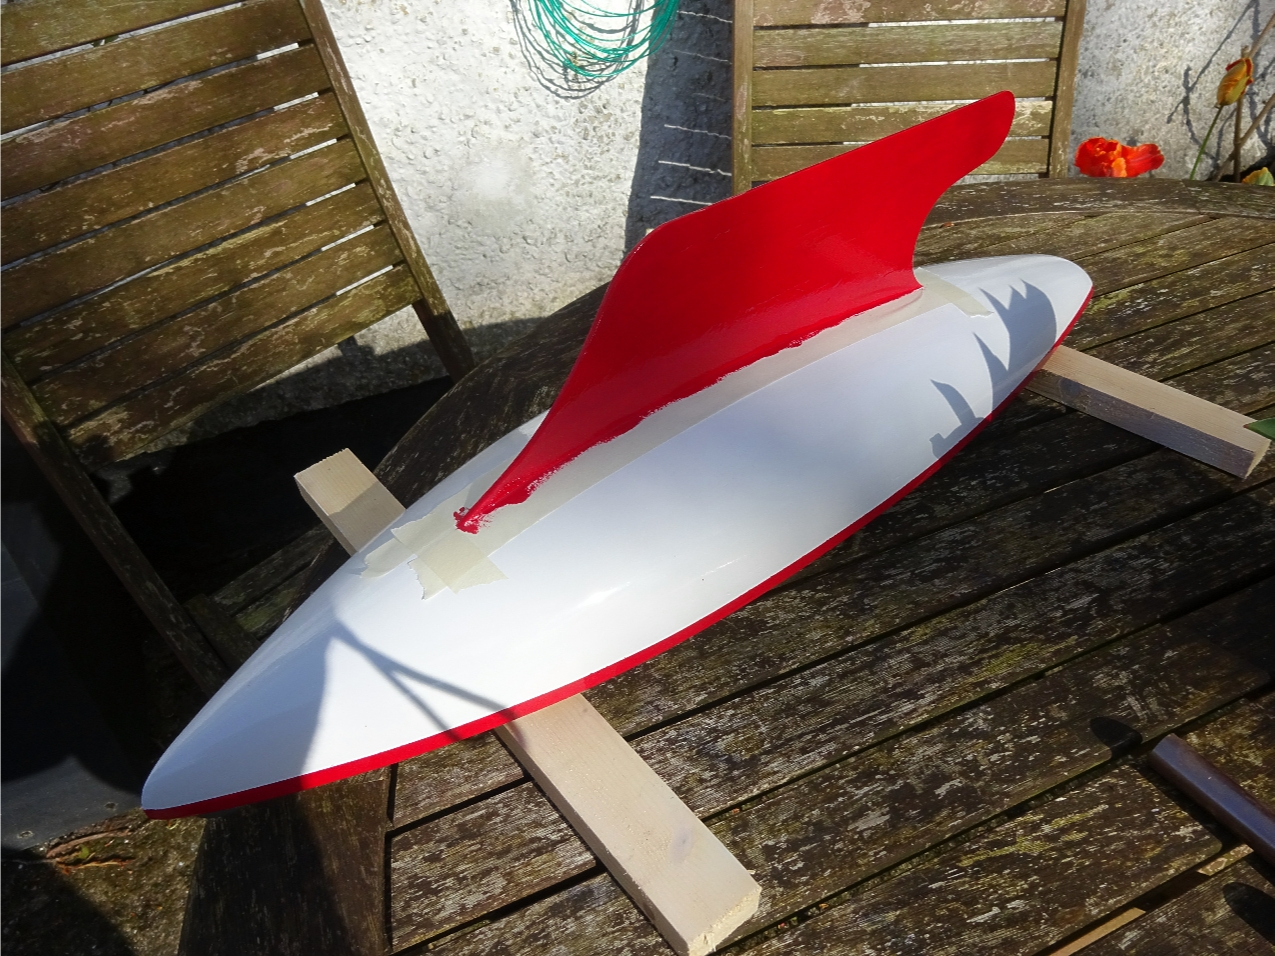
As this yacht is having a red coloured keel, I upturned the hull masked off the surrounding area and gave the keel two coats of the same red paint used for the edging strip.
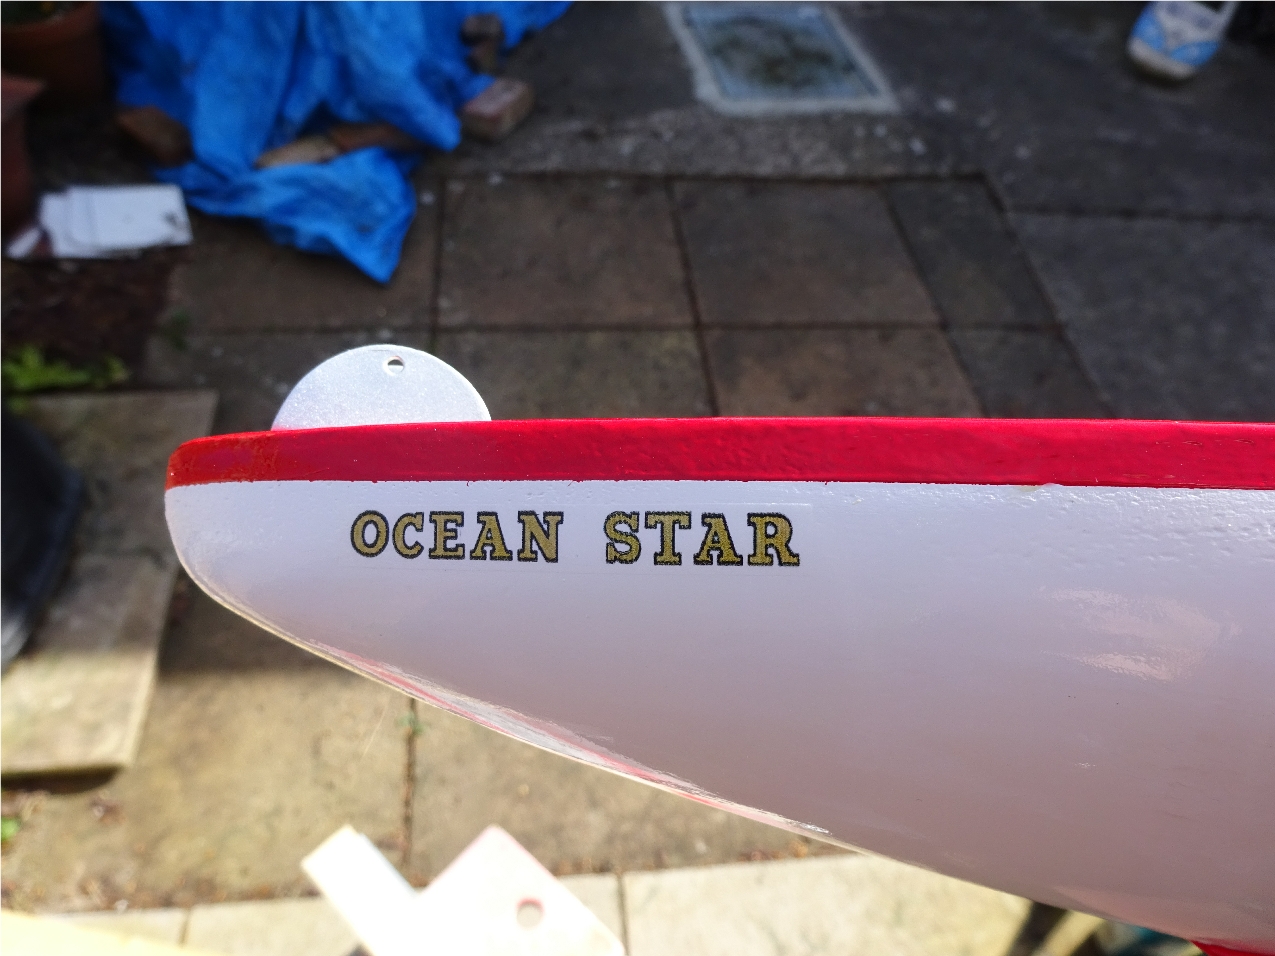
Lastly fit the bow name transfers, in this case "OCEAN STAR". There have been instances of SY/7s being called "ARCTIC STAR" but probably due to low stocks of transfers in the factory. If you are going to sail your yacht, don't forget to put a coat of clear varnish over the transfers to help stop them being washed off.